Posted by napsters

 Hits
Hits
Animated Landscape Using CSS and jQuery
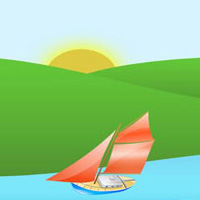

Check Out DEMO
Step 1 : Organize Files
First of all we need to setup all our files which required in this tutorial, create one HTML file, CSS file and image folder which holds all our imagesStep 2 : HTML Document
Here we need to write our html document first, which contains wrapper with fixed height and width and within it one container which holds all the elements of our page. Check out the code below<div id="wrapper"> <div id="inner"> <div id="cloudone"><img src="images/clud1.png" alt="" /></div> <div id="cloudtwo"><img src="images/clud2.png" alt="" /></div> <div id="cloudthree"><img src="images/clud1.png" alt="" /></div> <div id="boat"><img src="images/boat.png" alt="" /></div> </div> </div>
<html xmlns="http://www.w3.org/1999/xhtml">
<head>
<meta http-equiv="Content-Type" content="text/html; charset=utf-8" />
<title>Animated Landscape Using CSS and jQuery</title>
<link href="style.css" rel="stylesheet" type="text/css" />
</head>
<body>
<div id="wrapper">
<div id="inner">
    <div id="cloudone"><img src="images/clud1.png"></div>
    <div id="cloudtwo"><img src="images/clud2.png"></div>
    <div id="cloudthree"><img src="images/clud1.png"></div>
    <div id="boat"><img src="images/boat.png"></div>
</div>
</div>
</body>
</html>
Step 3 : CSS Styling
Now some css styling is required. Important thing to keep in mind is to have overlay hidden for container(#inner) and position absolute for all the moving images. Here we will keep our moving images like clouds and boat out of the container with the help of negative left and right margin so that while using jquery we would have a nice effect. Check out the below CSS codes.#wrapper { width:800px; height:600px; /* main background image with sky, sun, river and ground */ background-image:url(images/Untitled-3.jpg); background-repeat:no-repeat; margin-top:10px; margin-left:auto; margin-right:auto; border: 10px solid #666; } #inner { position:relative; overflow:hidden; width:800px; height:600px; margin:0px; } #cloudone { position:absolute; margin-top:2px; margin-left:-200px; filter:alpha(opacity=80); /* CSS3 standard */ opacity:0.8; } #cloudtwo { position:absolute; margin-top:80px; margin-left:-300px; filter:alpha(opacity=60); /* CSS3 standard */ opacity:0.6; } #cloudthree { position:absolute; margin-top:60px; margin-left:-600px; filter:alpha(opacity=70); /* CSS3 standard */ opacity:0.7; } #boat { margin-top:360px; position:absolute; margin-left:800px; }
Step 4 : Jquery
First of all we need to tag below lines to the head of our html document.<script src="http://ajax.googleapis.com/ajax/libs/jquery/1.4.1/jquery.min.js" type="text/javascript"></script> <script src="landscape.js" type="text/javascript"></script>
function cloudone(){
    $("#cloudone").animate({left:"+=1200px"},10000).animate({left:"-200px"}, 0)
    setTimeout("cloudone()",10000);
}
function cloudone(){
   $("#cloudone").animate({left:"+=1200px"},10000).animate({left:"-200px"}, 0)
   setTimeout("cloudone()",10000);
}
function cloudtwo(){
   $("#cloudtwo").animate({left:"+=1500px"},15000).animate({left:"-300px"}, 0)
   setTimeout("cloudtwo()",15000);
}
function cloudthree(){
   $("#cloudthree").animate({left:"+=2000px"},20000).animate({left:"-600px"}, 0)
   setTimeout("cloudthree()",20000);
}
function boat(){
   //This time we need to move boat to left side so we put the margin to 1000px
   $("#boat").animate({right:"+=1000px"},20000).animate({right:"-200px"}, 0)
   setTimeout("boat()",20000);
}
$(document).ready(function() {
 setTimeout("cloudone()",10);
 setTimeout("cloudtwo()",10);
 setTimeout("cloudthree()",10);
 setTimeout("boat()",10);
});
$(document).ready(function() {
 setTimeout("cloudone()",10);
 setTimeout("cloudtwo()",10);
 setTimeout("cloudthree()",10);
 setTimeout("boat()",10);
});
function cloudone(){
 $("#cloudone").animate({left:"+=1200px"},10000).animate({left:"-200px"}, 0)
 setTimeout("cloudone()",10000);
}
function cloudtwo(){
 $("#cloudtwo").animate({left:"+=1500px"},15000).animate({left:"-300px"}, 0)
 setTimeout("cloudtwo()",15000);
}
function cloudthree(){
 $("#cloudthree").animate({left:"+=2000px"},20000).animate({left:"-600px"}, 0)
 setTimeout("cloudthree()",20000);
}
function boat(){
 $("#boat").animate({right:"+=1000px"},20000).animate({right:"-200px"}, 0)
 setTimeout("boat()",20000);
}